Guides/Start
Your first edit
From the start screen to an exported file in five steps: new project, import, cut, a title, export.
1. Make a project
Concat opens on the start screen. Click New project on the left, or the first card.
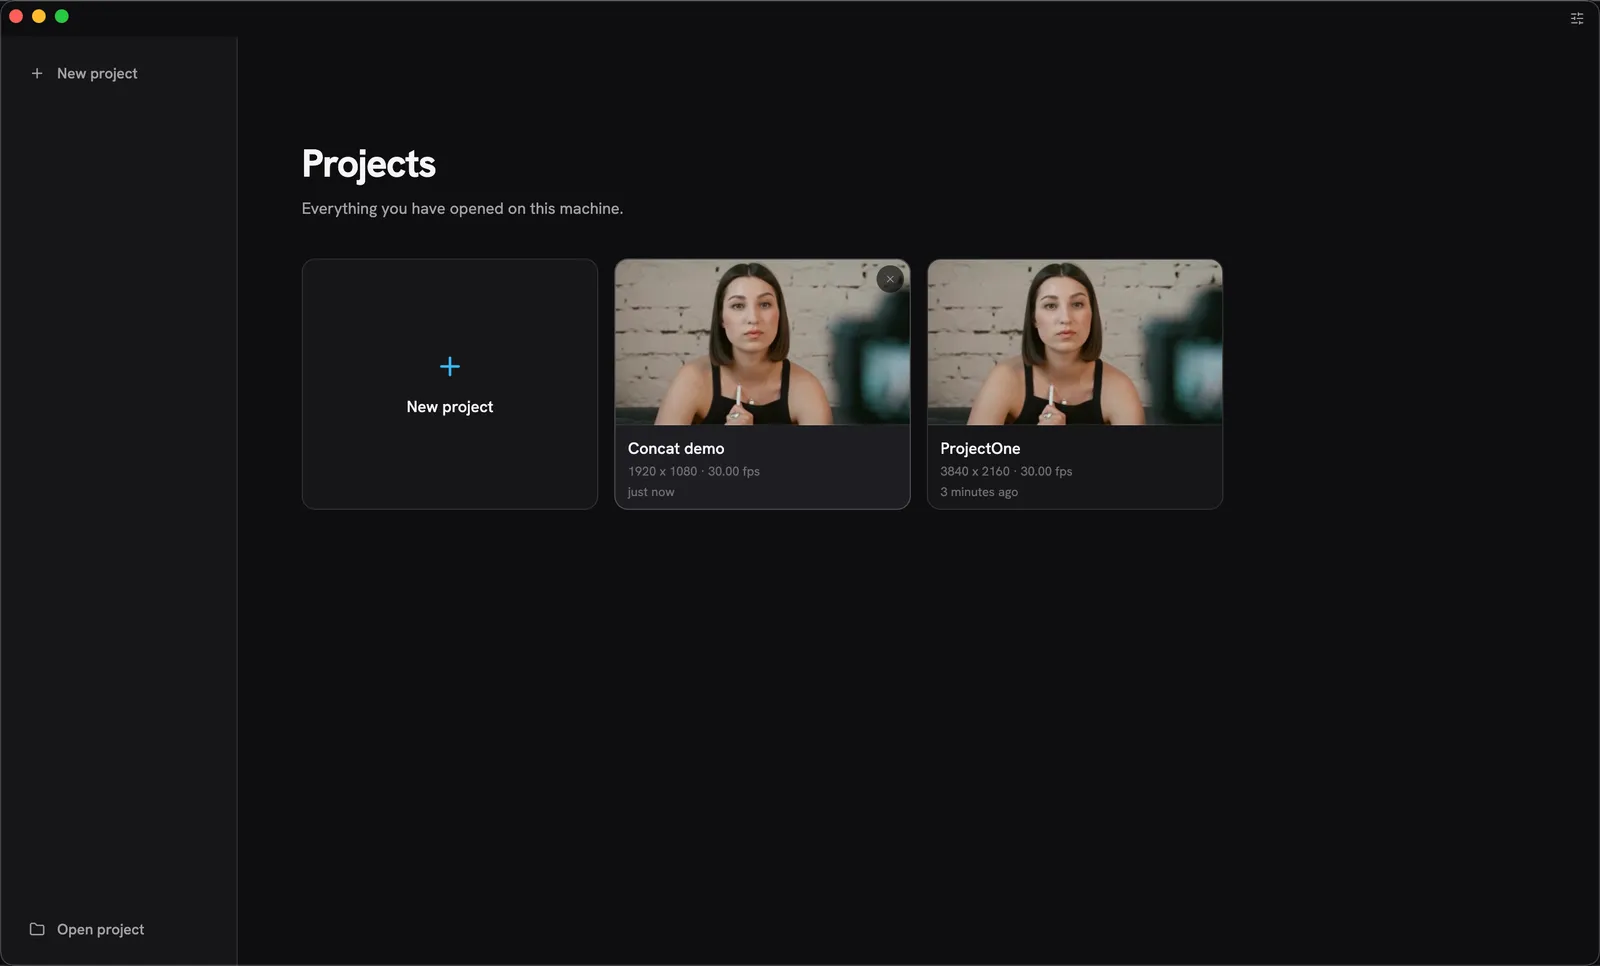
The start screen. Everything you have opened on this machine is listed under Projects.
The New project sheet asks for a name, a location (a Concat folder on your Desktop by
default), the shape of the frame (16:9, 9:16, 1:1 or 4:3), the size (720p to 4K, or
Custom) and the frame rate. Sizes are the short edge, so 9:16 at 1080p is 1080 by 1920, a
vertical video. Click Create. The project is a folder, and the edit autosaves into it from
now on.
2. Bring footage in
The editor opens with the Library on the left, the Preview in the middle, the Inspector on the right and the Timeline underneath.
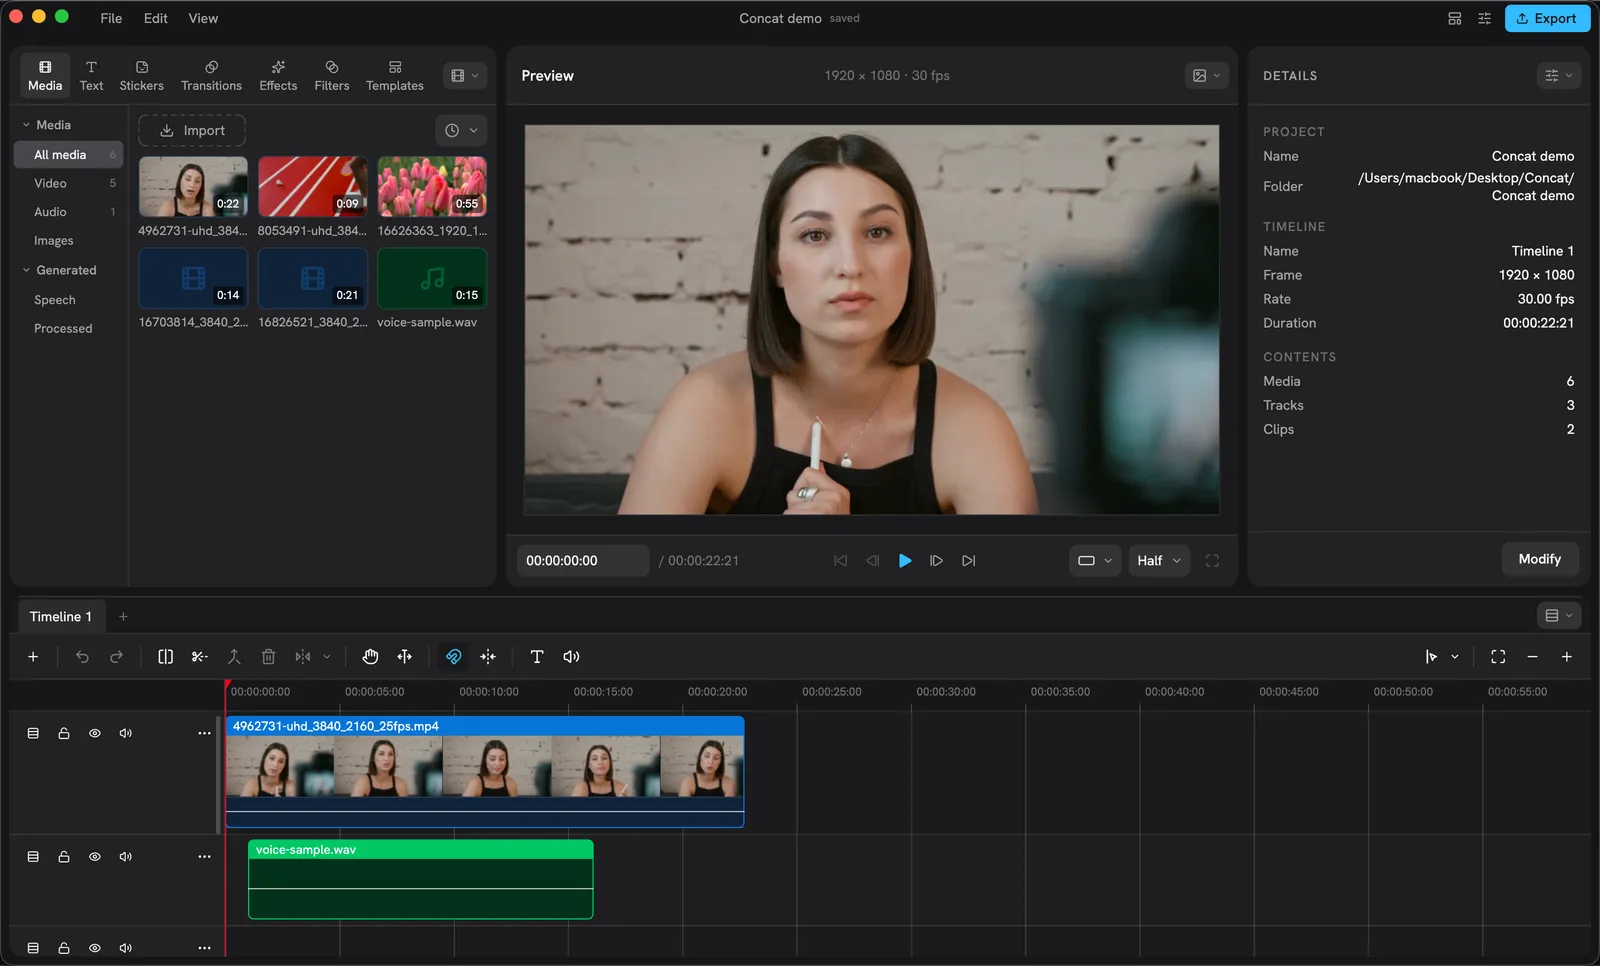
The editor. Nothing is selected, so the Inspector shows the project’s details.
Click Import at the top of the Library (or press ⌘I on a Mac,
Ctrl+I elsewhere), or drag files from your desktop onto the Library. Video, audio and pictures all land in the bin under All media.
To get a file onto the timeline, double-click its card: it lands at the playhead. Or drag the card onto a lane to put it exactly where you want. A single click only previews the file in the monitor.
3. Cut
The tray above the lanes holds the editing tools.

The tray, left to right: add a track, undo and redo, split at playhead, the razor, merge, delete, the freeze and rotate menu, the pan tool, trim follow, snap, the magnetic switch, Generate Captions and Text to Speech.
- Scrub by dragging on the ruler, or press Space to play.
- Put the playhead where you want the cut and press ⌘B (Ctrl+B): every clip under the playhead splits.
- Or press B for the razor and click a clip where you want it cut.
- Drag a clip’s edge to trim it. Drag the clip itself to move it.
- Select a clip and press Delete. With the Magnetic timeline switch on, what follows slides into the gap; off, the gap stays. Shift+Delete always closes the gap.
Every move is one undo step: ⌘Z and ⇧⌘Z.
4. Add a title
Open the Library’s Text page and click Default title, or one of the looks under Styles. A title lands at the playhead on the first free lane above the picture. Type into the Content box in the Inspector; drag the title around on the monitor to place it. The titles guide covers fonts, shadows and background plates.
Want the words spoken rather than written? Text to speech is one button away on the tray. Want the words that are already spoken on screen? Auto-captions.
5. Export
Click the blue Export button at the top right of the window (or press
⌘E). The sheet starts at the timeline’s own size and rate with Balanced quality, which is right for almost everything. Pick a name, click Export, and the file goes to your Movies folder. The export guide has the rest: codecs, 10-bit, bitrate.
That is the whole loop. Everything else on these pages is a detail of one of these five steps.